Example 2: Dialogue Controller
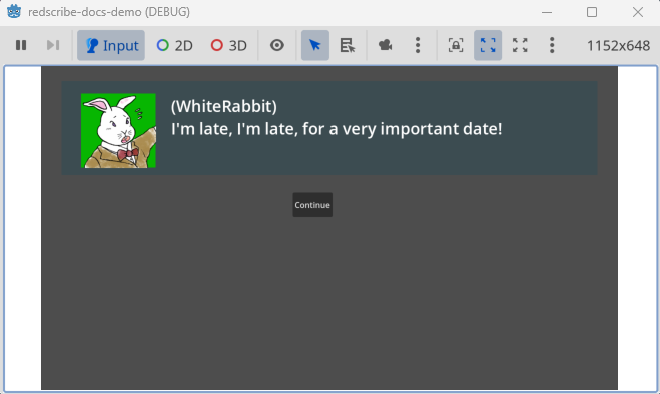
We’ll create a dialogue controller like the one shown below. Let’s build it together, step by step, as we gradually add DSL syntax.
Create a Scene
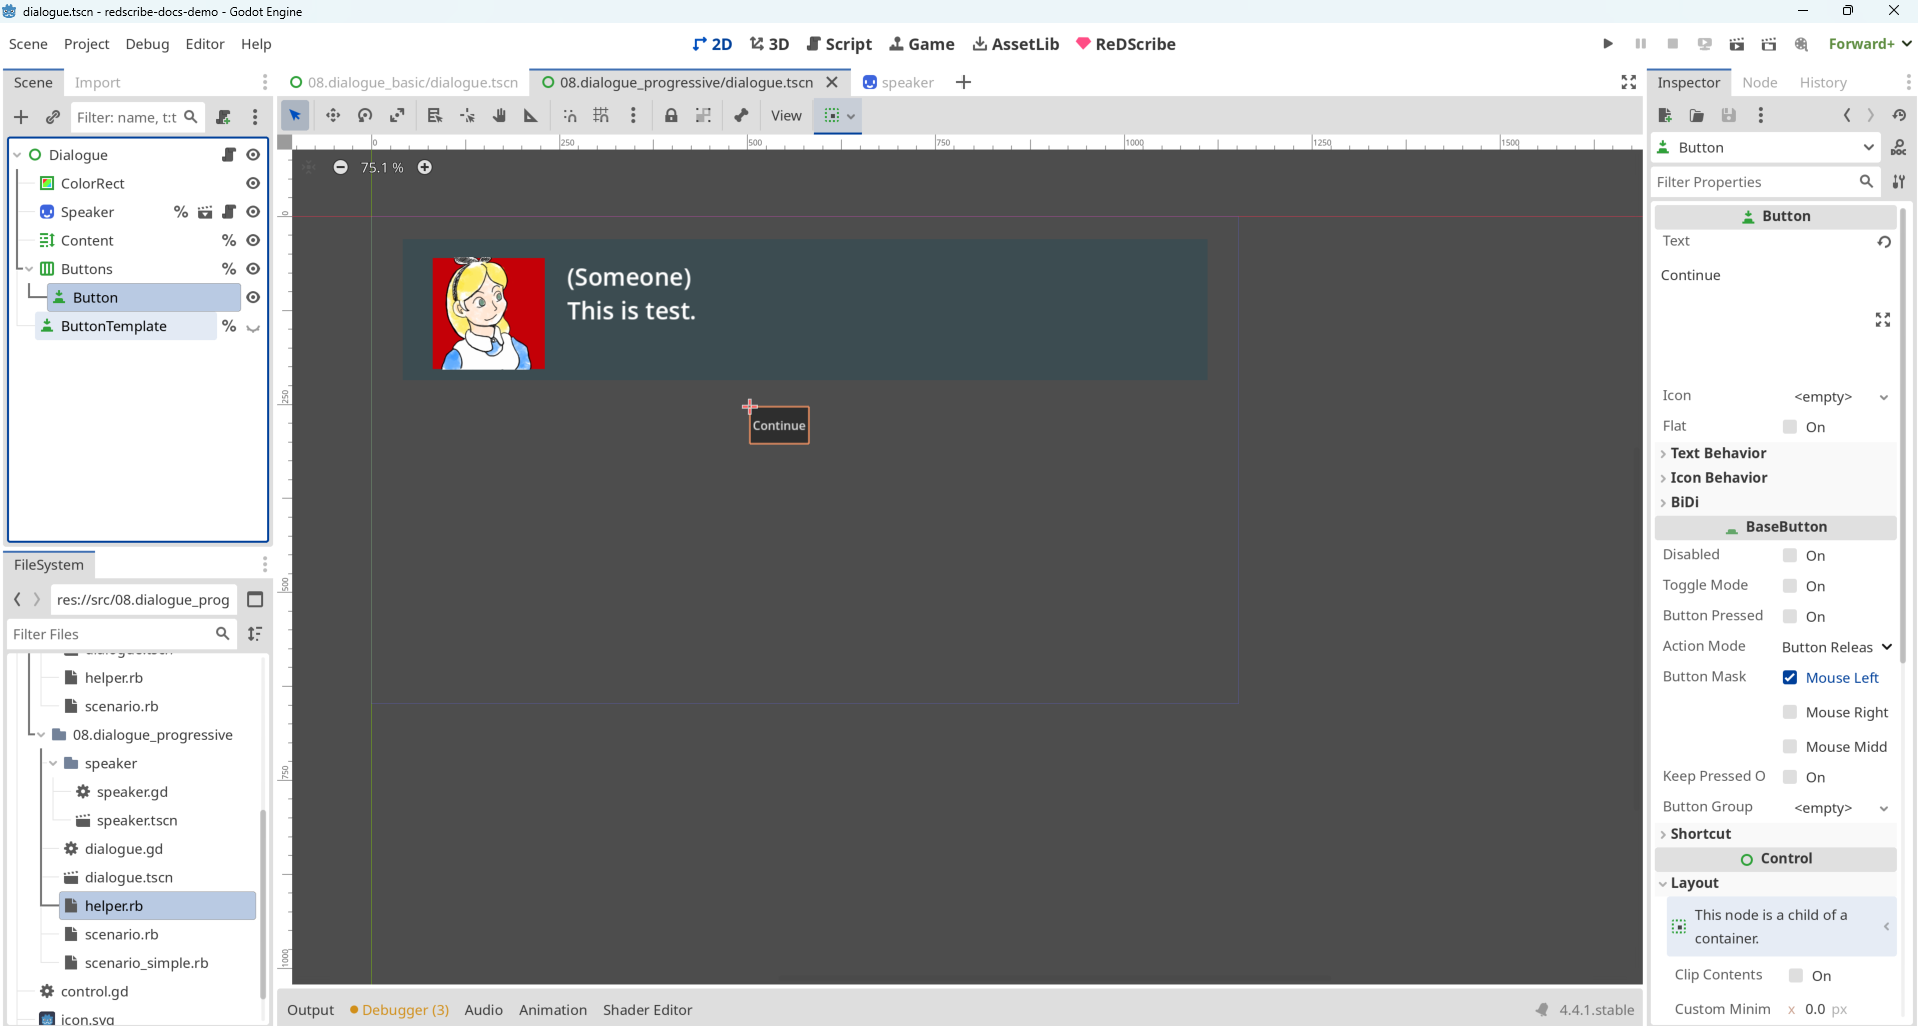
First, create a scene with a Control node named Dialogue.
Then, add child nodes so that the scene tree looks like the example below.
Make sure that Content and Button are accessible by their unique node names.
Dialogue <Control Node>
  ├ ColorRect
  ├ Content <RichTextLabel Node>
  └ Button
Resize the ColorRect to serve as the dialog frame, and place the Content inside it.
Finally, position the Button below the frame.
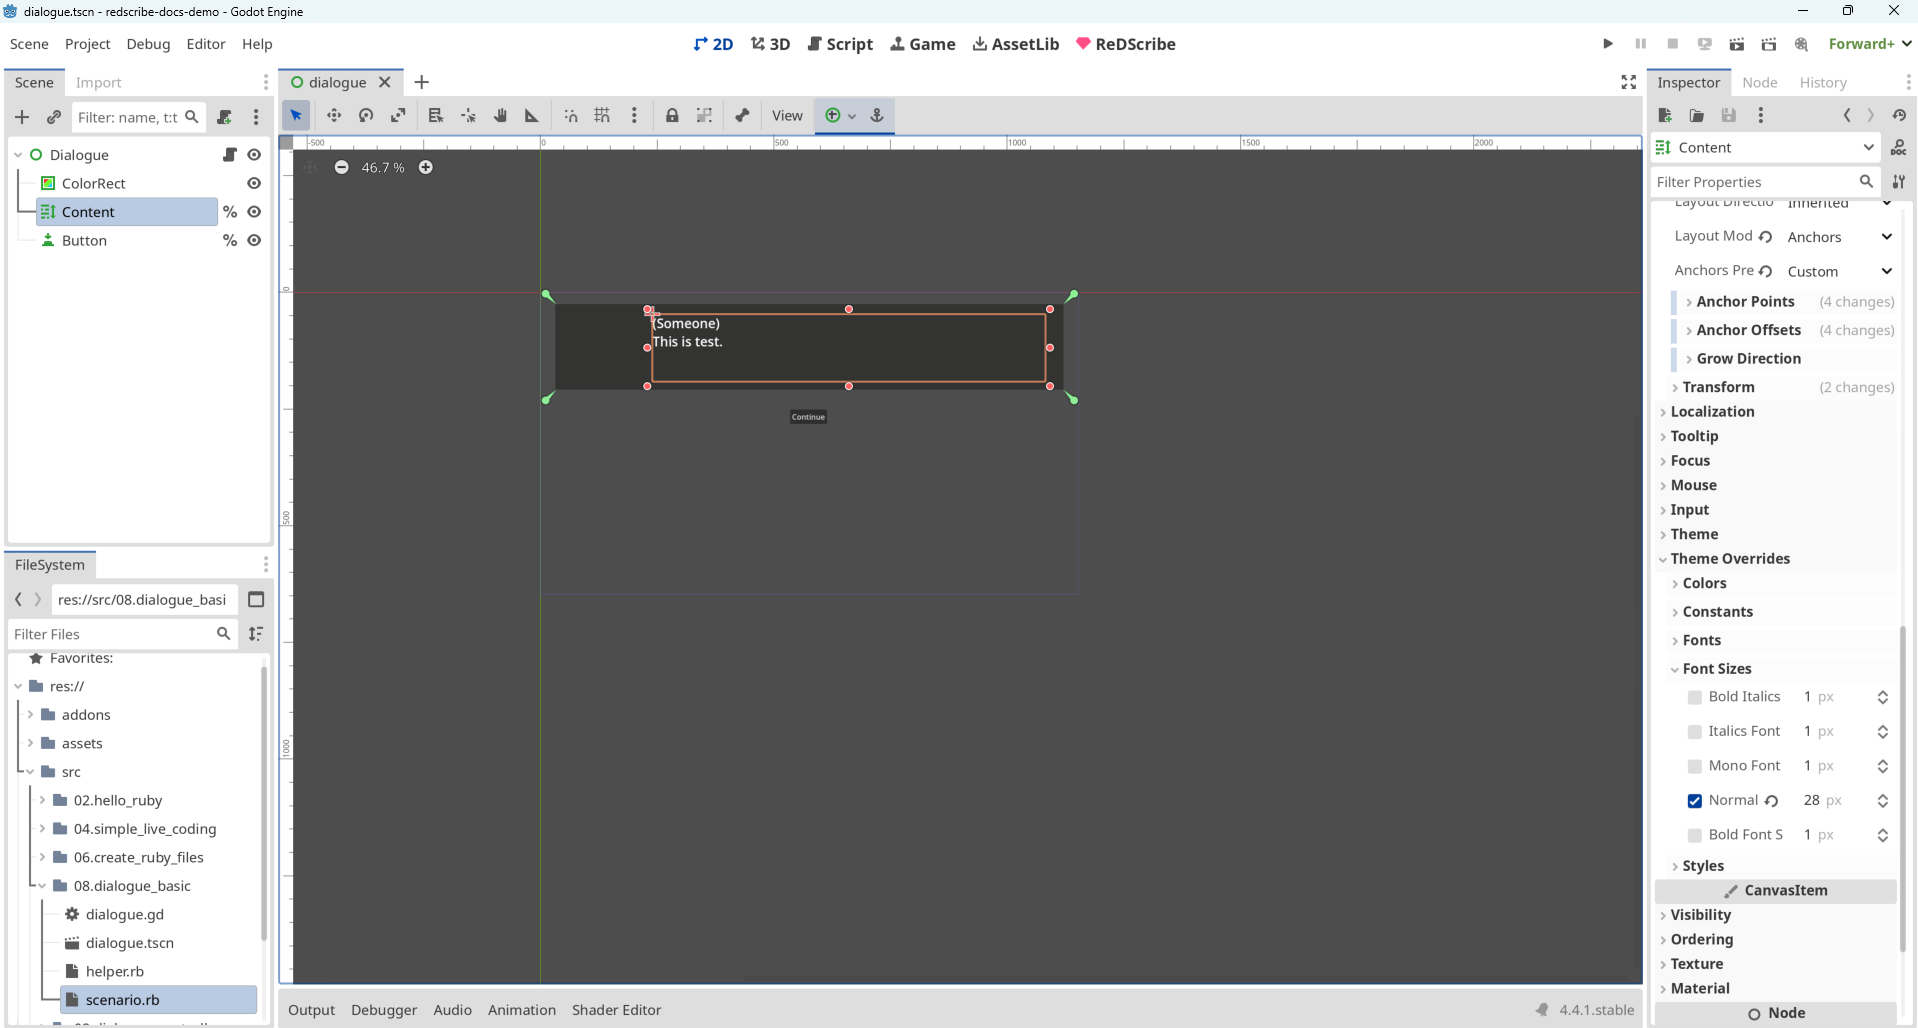
If the text looks too small, try adjusting the Font Size from the Inspector.
Designing the DSL
Let's explore a DSL for displaying dialogue content within the Content node of the scene we created.
Ideally, it should offer the readability and ease of use of plain text.
Striving for Readability
Since we want the lines to be easy to read aloud, we aim for a format like: (Character) say "(Line)"
This structure feels natural and expressive.
How should we define this?
Defining via Method Calls
Let's begin with a simple approach: using method calls with keyword-style arguments.
Alice says: "I love Ruby."
This is beautiful—just one line, with clarity and elegance.
However, if we continue writing this way, the alignment of says can become uneven depending on the length of character names, which slightly affects readability.
Also, when the same character speaks multiple times in succession, the repetition can feel verbose.
Alice says: "I love Ruby."
Benjamin says: "I love Ruby too."
Benjamin says: "I also love Godot."
Defining with Blocks
Next, let's consider using blocks.
Since each character name is followed by a line break, the position of says remains aligned.
This also helps avoid redundancy when the same character speaks multiple times.
Alice do
  says "I love Ruby."
end

Benjamin do
  says "I love Ruby too."
  says "I also love Godot."
end
However, the extra line required for end can feel a bit distracting.
What we're aiming for is a DSL where dialogue flows naturally from top to bottom―spoken lines by characters, readable and writable like a gentle stream. Ideally, we'd like to omit any unnecessary lines.
Using const_missing
Is it possible to remove the end lines from the code above and still make it work?
After some thought, it seems feasible with the following structure:
Alice;
  says "I love Ruby."

Benjamin;
  says "I love Ruby too."
  says "I also love Godot."
By treating character names as constants rather than methods, and leveraging metaprogramming via const_missing, we can eliminate the extra end lines.
Creating a Helper to Run the DSL
Let's write the code needed to run the DSL above.
Save the following code as a helper.rb file in the same directory as the scene.
I ended up using a mix of metaprogramming techniques―but all in service of bringing the ideal DSL to life.
# = Redirects method calls to Xxx.current
#
#   `delegate Foo, :bar` means calling `bar` will forward to `Foo.current.bar`
#
def delegate(const, *keys)
  keys.each do |key|
    define_method(key) do |*args|
      const.current.send(key, *args)
    end
  end
end


class Dialogue
  class << self
    attr_accessor :current
  end

  attr_accessor :fiber

  def initialize(&block)
    self.fiber = Fiber.new do
      yield
      Godot.emit_signal :finished, true
    end
    Dialogue.current = self
  end

  def continue(val = nil)
    fiber.resume(val)
  end

  def listen!
    Fiber.yield
  end
end
delegate Dialogue, :continue #


class Speaker
  class << self
    attr_accessor :all, :current
  end
  self.all = []

  attr_accessor :name

  def initialize(name)
    self.name = name
    Speaker.all << self
  end

  def says(str)
    emit :says, { content: str }
    Dialogue.current.listen!
  end

  private
    def emit(key, args = {})
      Godot.emit_signal key, { name: name, **args }
    end
end
delegate Speaker, :says #


# = const_missing
#
#   `Alice;` sets `Speaker.current` to the Speaker instance named "Alice"
#
def Object.const_missing(name)
  speaker = Speaker.all.find{|s| s.name == name.to_s }
  if speaker
    Speaker.current = speaker
  else
    super
  end
end


def speakers(names)
  names.each{|name| Speaker.new(name) }
end
Once you've saved the file, try running the following in the REPL:
You'll need to specify the path to the file you just created in require 'path/to/helper'.
If typing it out feels tedious, you can simply drag and drop the Ruby file from the FileSystem into the REPL input field.
This will automatically insert the correct require 'path/to/helper' line,
and this feature works not only in the REPL, but also in the Editor.
require 'path/to/helper'

Dialogue.new do
  speakers %w(Narrator WhiteRabbit Alice)

  Narrator;
    says "One sunny afternoon,"
    says "Alice met the White Rabbit"

  Alice;
    says "Hi! I'm Alice. I'm curious!"

  WhiteRabbit;
    says "Hi, I'm late. I'm busy."
end
=> "#<Dialogue:0x177babf47d0 @fiber=#<Fiber:0x177babf46e0 (created)>>"
The Fiber was successfully created without any errors.
Next, run the following:
continue
[ says ] signal emitted: { &"name": "Narrator", &"content": "One sunny afternoon," }
=> <null>
A signal with the key says was emitted.
The content was correctly assigned to the corresponding name.
It looks like it's working smoothly.
Now, go ahead and run continue four more times.
[ says ] signal emitted: { &"name": "Narrator", &"content": "Alice met the White Rabbit" }
=> <null>

[ says ] signal emitted: { &"name": "Alice", &"content": "Hi! I\'m Alice. I\'m curious!" }
=> <null>

[ says ] signal emitted: { &"name": "WhiteRabbit", &"content": "Hi, I\'m late. I\'m busy." }
=> <null>

[ finished ] signal emitted: true
=> true
Each name was correctly paired with the expected content.
Finally, a signal with the key finished was emitted, indicating the process has completed successfully.
So what happens if we call continue again after it's already finished?
The answer: it results in an error.
Error: resuming dead fiber (FiberError)
A Fiber maintains its own state to indicate whether it has finished.
Dialogue.current.fiber

Dialogue.current.fiber.alive?
=> "#<Fiber:0x177babf46e0 (terminated)>"

=> false
When working with a Fiber, you can either handle its state using the methods above, or―like in this example―emit a signal at the end of the Fiber.new do ... end block to avoid errors.
Attach a GDScript
Now that the DSL syntax and signal structure are in place, let's write the logic for the Dialogue scene.
Attach the following GDScript to the scene:
extends Control

@export var controller : ReDScribe


func _ready() -> void:
	controller.channel.connect(_handle)
	%Button.pressed.connect(continue_dialogue)
	clear()


func speak(speaker: String, content: String) -> void:
	%Content.text = "(%s)\n%s" % [speaker, content]


func continue_dialogue() -> void:
	controller.perform('continue')


func clear(all: bool = false) -> void:
	%Content.text = ''
	if all: %Button.hide()


func _handle(key: StringName, payload: Variant) -> void:
	match key:
		&'says': speak(payload['name'], payload['content'])
		&'finished': clear(true)
		_: print_debug('[%s] %s', [key, payload])
Create a Scenario (Ver. 1)
Everything's ready.
Let's write the conversation script and save it as scenario.rb.
You might not even realize this is written in a programming language—but that's the magic of Ruby's flexibility.
require 'path/to/helper'
Dialogue.new do
  speakers %w(Narrator WhiteRabbit Alice)

  Narrator;
    says "Alice is resting in the field."
    says "Suddenly, she hears a panicked voice from afar."

  WhiteRabbit;
    says "I'm late, I'm late, I'm late!"

  Alice;
    says "Hi! Where are you going?"

  WhiteRabbit;
    says "I'm late, I'm late, for a very important date!"

  Alice;
    says "Wait!"
end
Click the Controller property in the Inspector and select New ReDScribe.
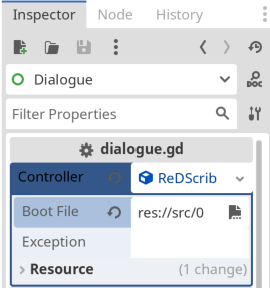
Set the scenario.rb file you created as the Boot File, then run the scene.
Did the conversation dialogue appear as shown in the video below?
If you found this step difficult, the demo project is available on the following GitHub repository. Feel free to check it out: https://github.com/tkmfujise/redscribe-docs-demo/tree/main/src/08.dialogue_basic
Controlling Character Expressions
You've built the foundation of the conversation dialogue. Next, let's add face graphics to bring the dialogue to life.
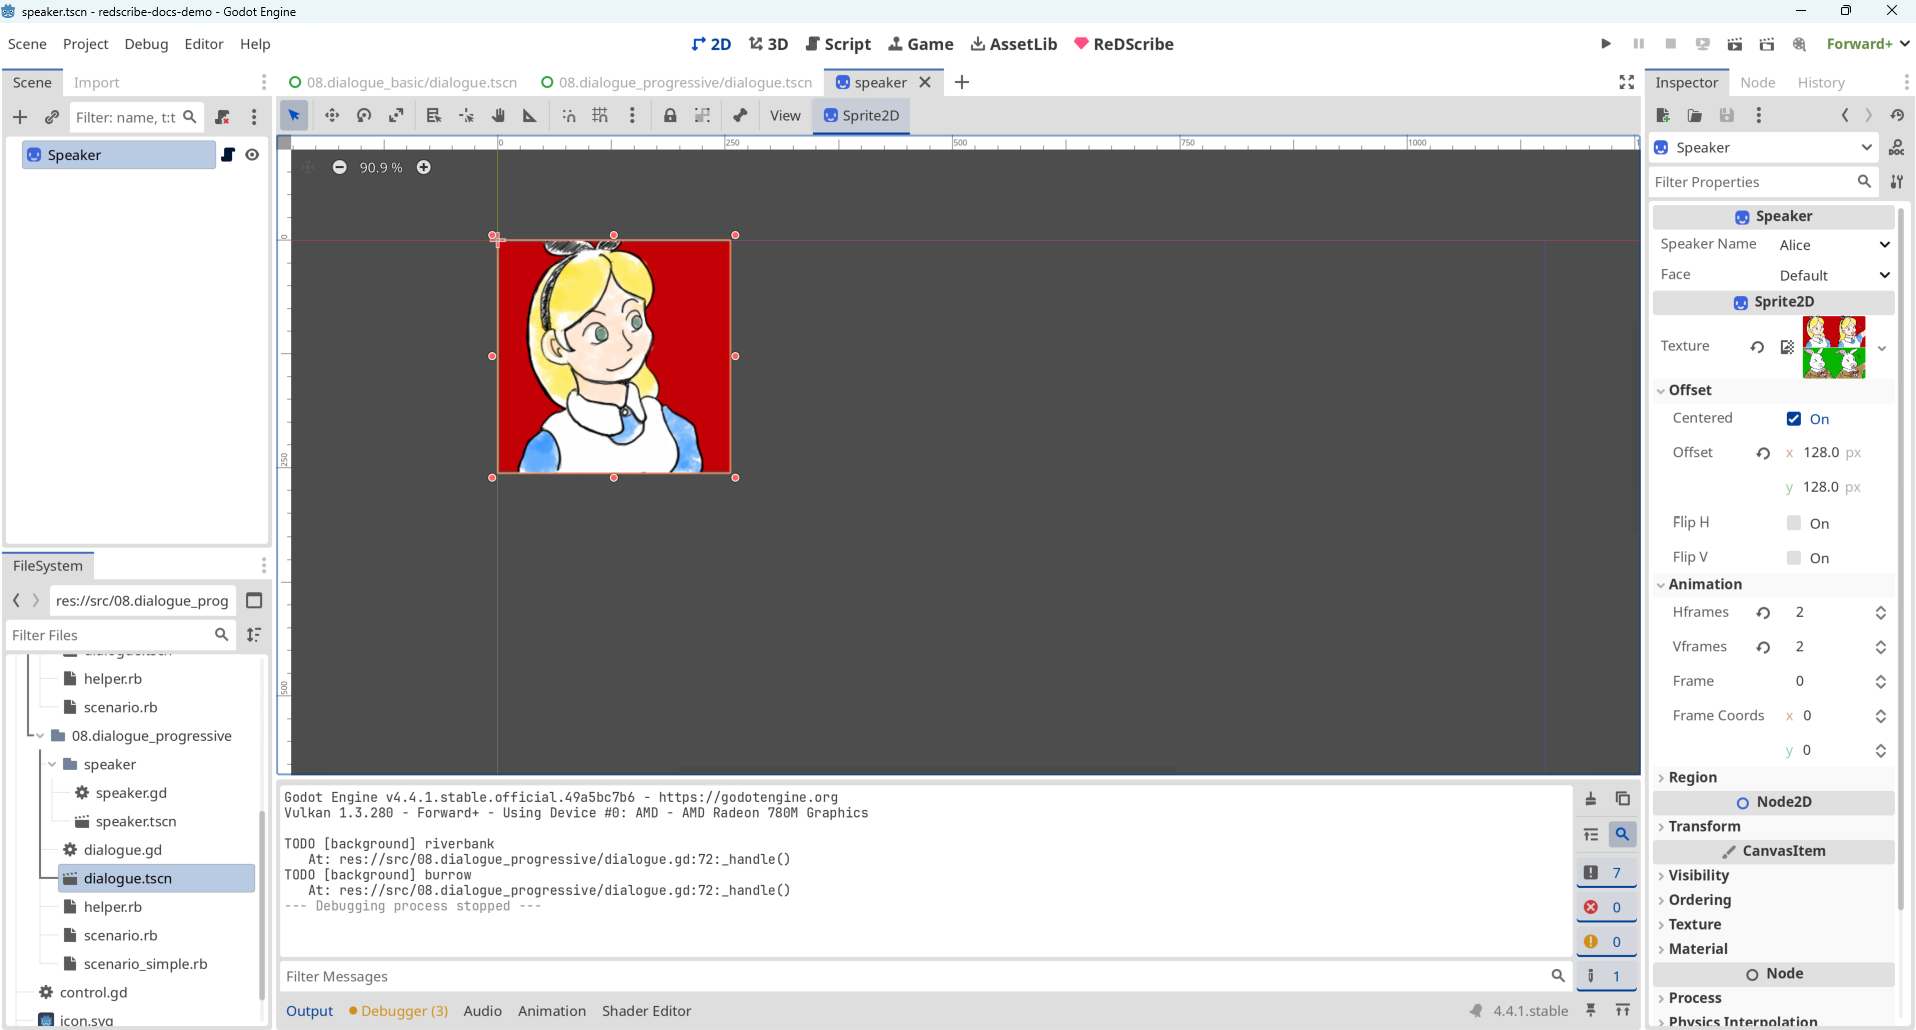
Create the Speaker Scene
Create a new scene named Speaker to manage face graphics.
Start with a Sprite2D node, and assign a 2x2 tile image that includes both the default and flustered expressions. (If you'd like to use the same image as the sample, you can download it here.)
Set HFrames and VFrames to "2".
We'll use Frame Coords to control which character and expression are displayed.
extends Sprite2D
class_name Speaker

enum Name { Alice, WhiteRabbit }
enum Face { DEFAULT, FLUSTERED }

@export var speaker_name : Name : set = set_speaker
@export var face : Face : set = set_face


func set_speaker(val: int) -> void:
	frame_coords.y = val
	speaker_name = val as Name


func set_face(val: int) -> void:
	frame_coords.x = val
	face = val as Face
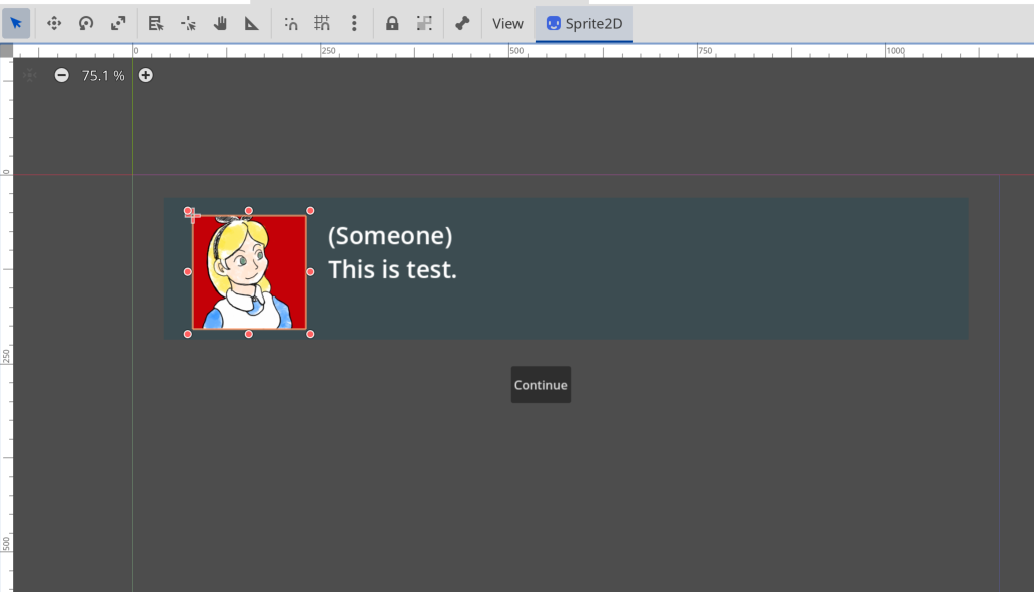
Add to the Dialogue Scene
Add the Speaker scene to the Dialogue scene and position it within the dialogue frame.
Make sure the Speaker node can be accessed by its unique name.
Before modifying the GDScript, let's consider how to update the DSL.
Update the Scenario (Ver. 2)
We'll extend the DSL with syntax to control character expression.
To do this, we'll define two methods: one for temporarily changing a character's expression, and one for changing it persistently.
Someone; with :some_facesets the expression until the next speaker speaks.Someone; got :some_facesets the expression persistently until another expression is assigned.
require 'path/to/helper'
Dialogue.new do
  speakers %w(Narrator WhiteRabbit Alice)

  Narrator;
    says "Alice is resting in the field."
    says "Suddenly, she hears a panicked voice from afar."

  WhiteRabbit; got :flustered
    says "I'm late, I'm late, I'm late!"

  Alice;
    says "Hi! Where are you going?"

  WhiteRabbit;
    says "I'm late, I'm late, for a very important date!"

  Alice; with :flustered
    says "Wait!"
end
Enable support for with and got calls, and update the signal to include the face attribute.
class Speaker
  class << self
    attr_accessor :all, :current

    def current=(speaker)
      current.temporary_face = nil if current
      @current = speaker
    end
  end
  self.all = []

  attr_accessor :name, :temporary_face, :permanent_face

  def initialize(name)
    self.name = name
    self.permanent_face = ''
    Speaker.all << self
  end

  def says(str)
    emit :says, { content: str }
  end

  def with(face)
    self.permanent_face = ''
    self.temporary_face = face.to_s
  end

  def got(face)
    self.permanent_face = face.to_s
  end

  def face
    temporary_face || permanent_face
  end

  private
    def emit(key, args = {})
      Godot.emit_signal key, { name: name, face: face, **args }
    end
end
delegate Speaker, :says, :with, :got #
Update the GDScript
Now that the DSL syntax and the shape of the emitted signals are defined, let's update the logic in the Dialogue scene.
We'll modify the speak method to change the face graphic.
func speak(speaker: String, content: String, face: String) -> void:
	%Content.text = "(%s)\n%s" % [speaker, content]
	set_speaker(speaker)
	set_face(face)


func set_speaker(speaker: String) -> void:
	%Speaker.show()
	match speaker:
		'Alice':       %Speaker.speaker_name = Speaker.Name.Alice
		'WhiteRabbit': %Speaker.speaker_name = Speaker.Name.WhiteRabbit
		_: %Speaker.hide()


func set_face(face: String) -> void:
	match face:
		'flustered': %Speaker.face = Speaker.Face.FLUSTERED
		_: %Speaker.face = Speaker.Face.DEFAULT


func clear(all: bool = false) -> void:
	%Speaker.hide()
	%Content.text = ''
	if all: %Buttons.hide()


func _handle(key: StringName, payload: Variant) -> void:
	match key:
		&'says':
			speak(payload['name'], payload['content'], payload['face'])
		&'finished': clear(true)
		_: print_debug('[%s] %s', [key, payload])
Try running it. If the face graphic switches correctly, you're good to go!
Displaying Choices
Let's add the ability to show choices during the dialogue.
Update the Scenario (Ver. 3)
We'll extend the DSL to support displaying choices.
The idea is to define a method for showing choices and another for retrieving the selected value:
asks "(line)"will display the dialogue line along with a set of choices.___?will retrieve the value selected by the user.
require 'path/to/helper'
Dialogue.new do
speakers %w(Narrator WhiteRabbit Alice)
Narrator;
says "Alice is resting in the field."
says "Suddenly, she hears a panicked voice from afar."
WhiteRabbit; got :flustered
says "I'm late, I'm late, I'm late!"
Alice;
says "Hi! Where are you going?"
WhiteRabbit;
says "I'm late, I'm late, for a very important date!"
Alice; with :flustered
says "Wait!"
Narrator;
says "Alice chased after the rabbit."
says "But the rabbit disappeared into a burrow."
Alice;
says "He went in here."
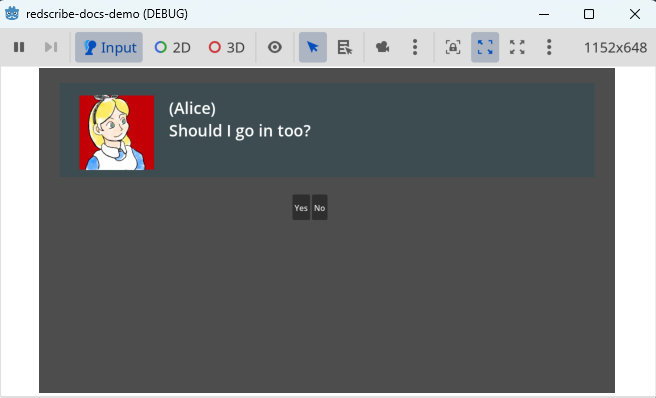
asks "Should I go in too?"
unless ___?
says "It looks so narrow and grimy... I really shouldn't."
until ___?
says "But I just can't stop wondering."
asks "Maybe I should go in after all?"
end
end
says "Alright, here goes!"
Narrator;
says "As Alice entered the burrow, the ground gave away and she fell down."
end
How do you feel about it? Everyone experiences if differently, of course, but I personally enjoy the snappy contrast between says and asks, and the way ___? feels like filling in a blank—it's quite satisfying.
We'll enable support for calling asks and ___?, and update the signal to include choices.
class Dialogue
  class << self
    attr_accessor :current
  end

  attr_accessor :fiber, :last_value

  def initialize(&block)
    self.fiber = Fiber.new do
      yield
      Godot.emit_signal :finished, true
    end
    Dialogue.current = self
  end

  def continue(val = nil)
    fiber.resume(val)
  end

  def listen!
    self.last_value = Fiber.yield
  end

  def ___?
    last_value
  end
end
delegate Dialogue, :continue, :___? #


class Speaker
  class << self
    attr_accessor :all, :current

    def current=(speaker)
      current.temporary_face = nil if current
      @current = speaker
    end
  end
  self.all = []

  attr_accessor :name, :temporary_face, :permanent_face

  def initialize(name)
    self.name = name
    self.permanent_face = ''
    Speaker.all << self
  end

  def says(str)
    communicate :says, str
  end

  def asks(str, choices = { 'Yes' => true, 'No' => false })
    communicate :asks, str, choices
  end

  def with(face)
    self.permanent_face = ''
    self.temporary_face = face.to_s
  end

  def got(face)
    self.permanent_face = face.to_s
  end

  def face
    temporary_face || permanent_face
  end

  private
    def emit(key, args = {})
      Godot.emit_signal key, { name: name, face: face, **args }
    end

    def communicate(key, str, choices = {})
      emit key, { content: str, choices: choices }
      Dialogue.current.listen!
    end
end
delegate Speaker, :says, :asks, :with, :got #
Update the Dialogue Scene
Rename the original Button node to ButtonTemplate and set it to hidden.
Create a new HBoxContainer node named Buttons, and add a single Button as its child for layout adjustment.
Dialogue <Control Node>
  ├ ColorRect
  ├ Speaker <Speaker Scene>
  ├ Content <RichTextLabel Node>
  ├ Buttons <HBoxContainer Node>
  │  └ Button
  └ ButtonTemplate
Update the GDScript
Update the logic so that when says or asks signals are emitted, choices are automatically generated.
To do this, use the set_choices method to duplicate the ButtonTemplate and create buttons for each choice.
Also, by using continue_dialogue.bind(value), you can pre-bind the value that will be passed to the Fiber when a button is pressed.
func set_choices(choices: Dictionary = { 'Continue': null }) -> void:
	for child in %Buttons.get_children(): child.queue_free()
	for key in choices: add_choice(key, choices[key])


func add_choice(txt: String, value: Variant) -> void:
	var btn = %ButtonTemplate.duplicate()
	%Buttons.add_child(btn)
	btn.text = txt
	btn.pressed.connect(continue_dialogue.bind(value))
	btn.show()


func continue_dialogue(value) -> void:
	controller.perform('continue %s' % _value_for_rb(value))
	if controller.exception:
		printerr("controller: %s" % controller.exception)


func clear(all: bool = false) -> void:
	%Speaker.hide()
	%Content.text = ''
	set_choices()
	if all: %Buttons.hide()


func _value_for_rb(value: Variant) -> Variant:
	match typeof(value):
		TYPE_STRING_NAME: return ':%s' % value
		TYPE_STRING:      return '"%s"' % value
		TYPE_NIL:         return 'nil'
		_: return value


func _handle(key: StringName, payload: Variant) -> void:
	match key:
		&'says':
			speak(payload['name'], payload['content'], payload['face'])
			set_choices()
		&'asks':
			speak(payload['name'], payload['content'], payload['face'])
			set_choices(payload['choices'])
		&'finished': clear(true)
		_: print_debug('[%s] %s', [key, payload])
Once you run it, you should see the choices appear as expected.
Changing Background Image or BGM
With what we've implemented so far, the dialogue system now supports the following features:
- Displaying text
- Changing face graphics
- Showing choices
In addition to these, what if you want to add more dramatic efforts—such as changing the background image or BGM?
Update the Scenario (Ver. 4)
Here, I'll introduce a new method scene :scene_name to represent scene transitions, such as changing the background image.
This allows you to specify the timing of the transition directly within the scenario.
require 'path/to/helper'
Dialogue.new do
  speakers %w(Narrator WhiteRabbit Alice)

  Narrator;
    says "Alice is resting in the field."
    says "Suddenly, she hears a panicked voice from afar."

  scene :riverbank

  WhiteRabbit; got :flustered
    says "I'm late, I'm late, I'm late!"

  Alice;
    says "Hi! Where are you going?"

  WhiteRabbit;
    says "I'm late, I'm late, for a very important date!"

  Alice; with :flustered
    says "Wait!"

  Narrator;
    says "Alice chased after the rabbit."
    says "But the rabbit disappeared into a burrow."

  scene :burrow

  Alice;
    says "He went in here."
    asks "Should I go in too?"
    unless ___?
      says "It looks so narrow and grimy... I really shouldn't."
      until ___?
        says "But I just can't stop wondering."
        asks "Maybe I should go in after all?"
      end
    end
    says "Alright, here goes!"

  Narrator;
    says "As Alice entered the burrow, the ground gave away and she fell down."
end
Add the scene method so that it emits a background signal.
class Dialogue
  class << self
    attr_accessor :current
  end

  attr_accessor :fiber, :last_value

  def initialize(&block)
    self.fiber = Fiber.new do
      yield
      Godot.emit_signal :finished, true
    end
    Dialogue.current = self
  end

  def continue(val = nil)
    fiber.resume(val)
  end

  def listen!
    self.last_value = Fiber.yield
  end

  def ___?
    last_value
  end

  def scene(sym)
    Godot.emit_signal :background, sym
  end
end
delegate Dialogue, :continue, :___?, :scene #
Update the GDScript
The implementation is omitted, but you should be able to change the background image by modifying the _handle method.
func _handle(key: StringName, payload: Variant) -> void:
	match key:
		&'says':
			speak(payload['name'], payload['content'], payload['face'])
			set_choices()
		&'asks':
			speak(payload['name'], payload['content'], payload['face'])
			set_choices(payload['choices'])
		&'background': print_debug("TODO [background] %s" % payload)
		&'finished': clear(true)
		_: print_debug('[%s] %s', [key, payload])
Refining the DSL
As the content displayed in the dialogue grows longer, some of you may start to feel that the DSL-specific keywords like says, asks and scene are beginning to feel like noice.
At first, I liked the idea of writing readable sentences like (Charater) say "(Line)", something you could almost speak aloud. But what truly matters is making it easy to write the character and their line.
So, how can we reduce the noise?
Update the Scenario (Ver. 5)
By using operator overloading, we can eliminate the need to explicitly write says, asks, or scene.
Let's add the following to helper.rb:
module SymbolExt
  def ~@
    scene self
  end
end
Symbol.prepend SymbolExt

module StringExt
  def -@
    says self
  end

  def !@
    asks self
  end
end
String.prepend StringExt
Each operator now acts as an alias:
says "content"becomes- "content"asks "content"becomes! "content"scene :scene_namebecomes~ :scene_name
Here's how the revised scenario looks:
require 'path/to/helper'
Dialogue.new do
  speakers %w(Narrator WhiteRabbit Alice)

  Narrator;
  - "Alice is resting in the field."
  - "Suddenly, she hears a panicked voice from afar."

  ~ :riverbank

  WhiteRabbit; got :flustered
  - "I'm late, I'm late, I'm late!"
  Alice;
  - "Hi! Where are you going?"
  WhiteRabbit;
  - "I'm late, I'm late, for a very important date!"
  Alice; with :flustered
  - "Wait!"
  Narrator;
  - "Alice chased after the rabbit."
  - "But the rabbit disappeared into a burrow."

  ~ :burrow

  Alice;
  - "He went in here."
  ! "Should I go in too?"
  unless ___?
    - "It looks so narrow and grimy... I really shouldn't."
    until ___?
      - "But I just can't stop wondering."
      ! "Maybe I should go in after all?"
    end
  end
  - "Alright, here goes!"

  Narrator;
  - "As Alice entered the burrow, the ground gave way and she fell down."
end
What do you think? By using operators, we've made the syntax more compact while keeping it readable. It's hard to believe this is still Ruby—it almost feels a plain-text format designed specially for dialogue systems.
Of cource, someone seeing this for the first time might not immediately grasp what each operator means or how it bahaves.
But compared to third-party dialogue systems, this approach offers a major advantage: you got to define the grammar yourself. There's no need to memorize awkward syntax or learn special embedded formats for control flow or variables. If something doesn't feel right, you can reshape it to fit your hand.
No need to write a parser—you can define your own grammar freely. Ruby will likely respond flexibly to the kind of game you want to create.
You can check out the demo we created here: https://github.com/tkmfujise/redscribe-docs-demo/tree/main/src/08.dialogue_refined
If you're having trouble getting it to work, feel free to use the above as a reference.